This lab, we start doing some hardware design. Specifically, the PCB design.
This lab is intended to go for 2 sessions, for this week session, we will get the schematic part of the lab.
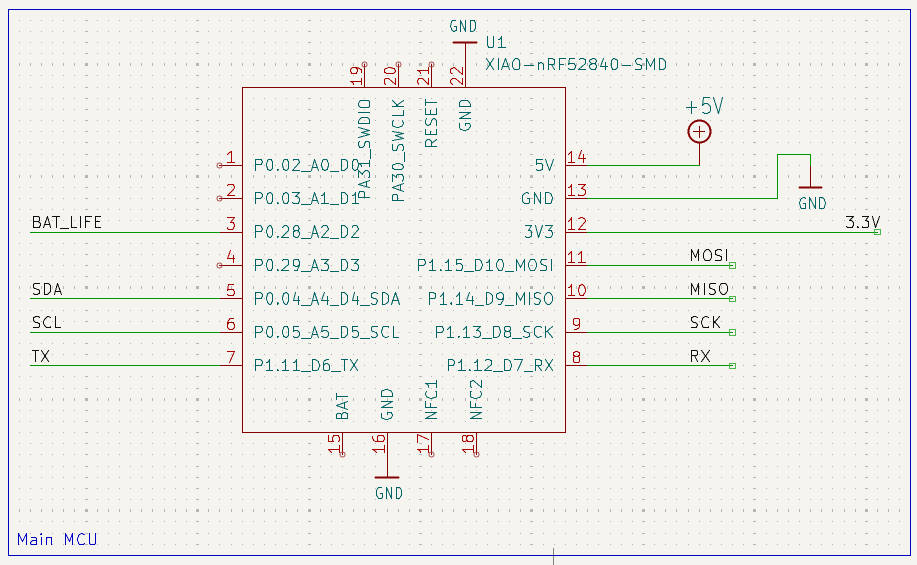
As show below, we start with the MCU as our central core.
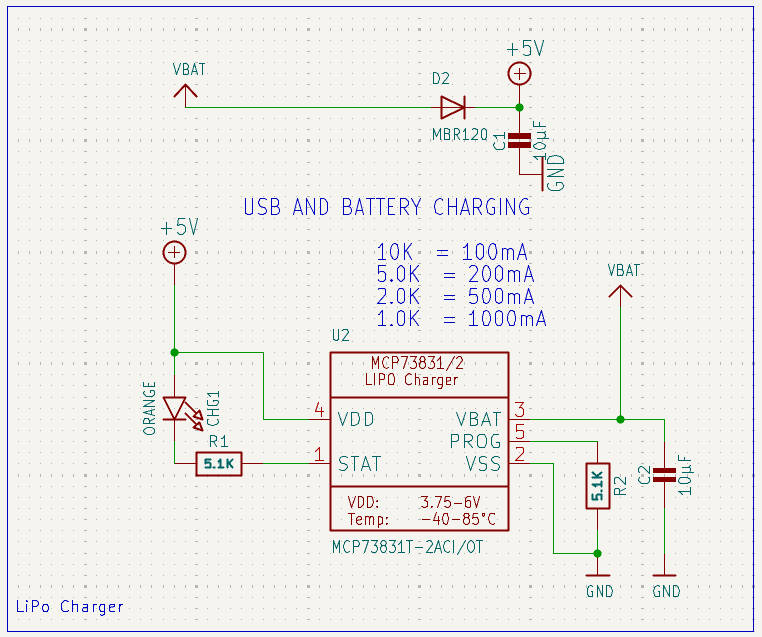
Then, we go with the power supply part, since we are going to use a battery, we will use a LIPO charger to enable both charging and battery mode.
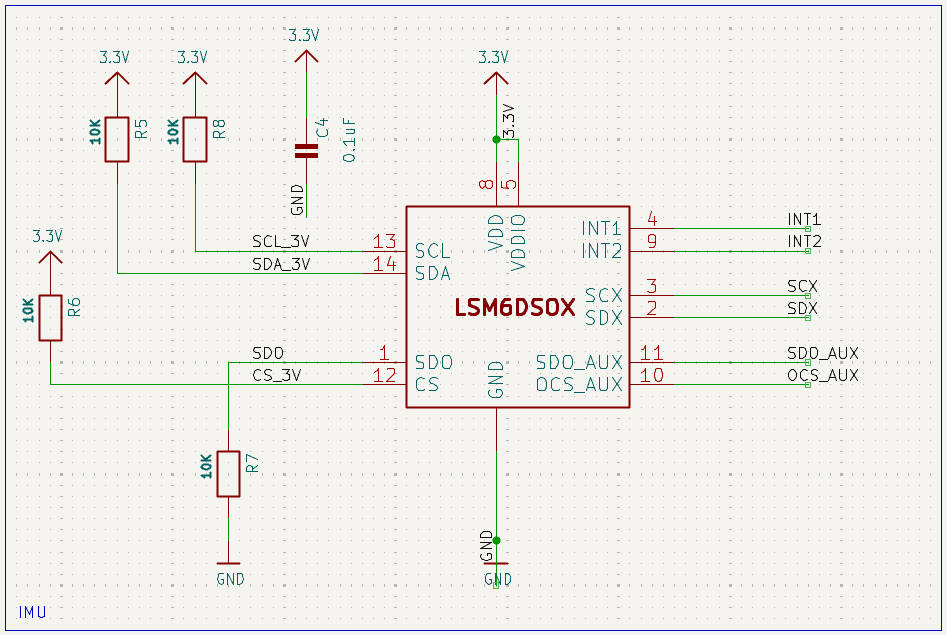
Then we start adding ultility modules, start from IMU.
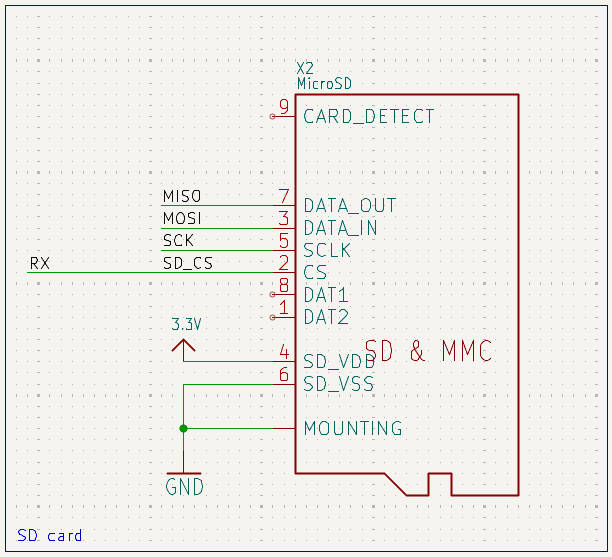
Also, SD card data read/write module.
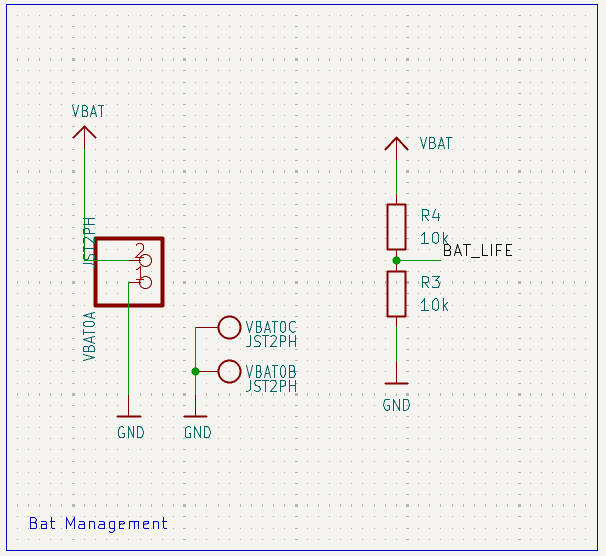
Finally, some miscellaneous component for battery management.
In the following week, we finished the PCB part of the design as well, which is the actual PCB board derived from the schematics we draw previous week.
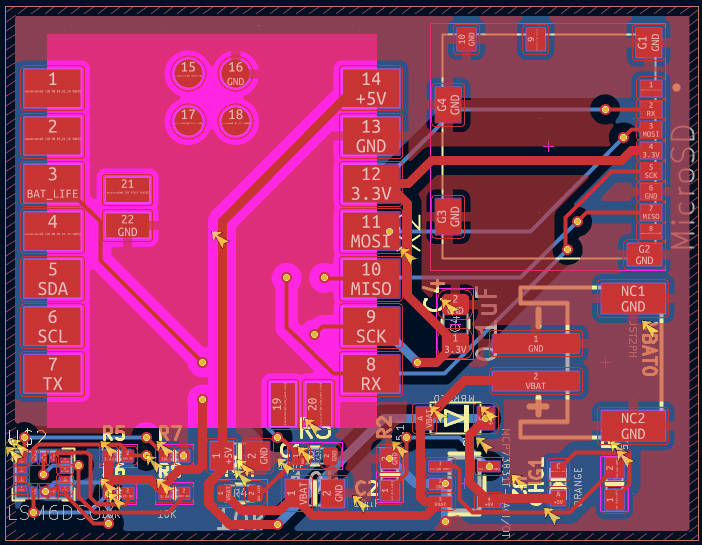
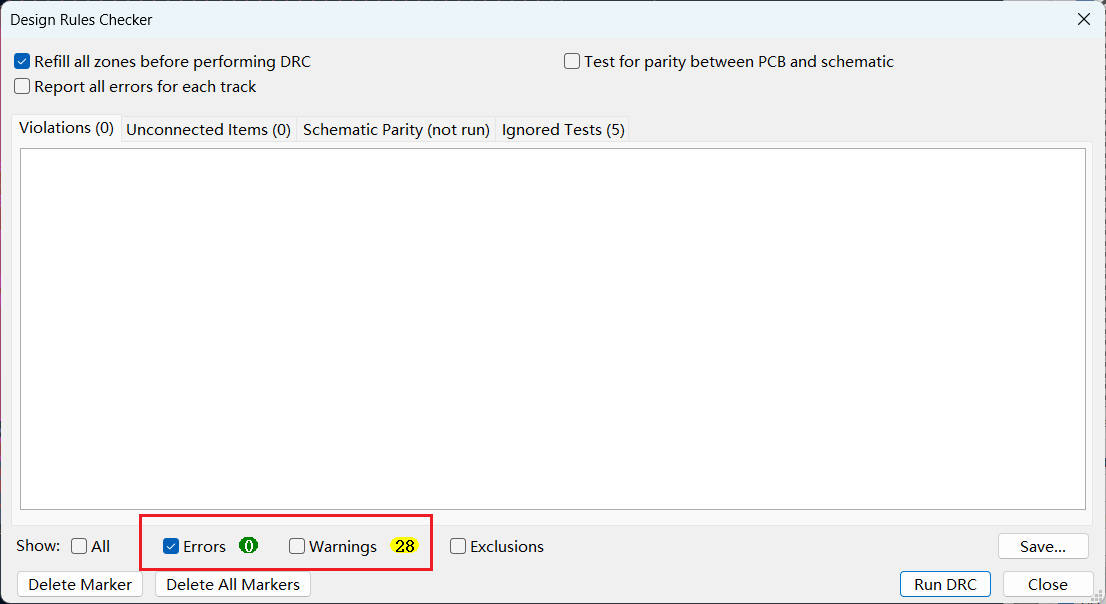
And we have run the Desing Rule Check (DRC) to make sure this board can be printed with no problem.